How To Centre your AP Div website in Dreamweaver CS4
I’d previously made a site in Golive but, since GoLive is going the way of the dodo, I decided I should move to Dreamweaver completely. Based around a good tutorial I’d previously used for GoLive at www,mindpalette.com, I had got my Layered site horizontally centred in web browsers (those capable of CSS), therefore I thought it ought to be possible to do the same for a new site created in Dreamweaver CS4 which had the AP Div options.
Anyway, since the above link for the how-to in GoLive isn’t exactly the same as how to achieve it in Dreamweaver (CS4 – I can’t confirm for older Dreamweaver versions though I would think it would work but some options may appear differently) I thought I’d spell out how I did it.
You follow this advice at your own discretion/risk etc, as I am no expert and do not know if this has any conflicts with any current browser (note that it does only work on browsers with CSS capabilities – reaaaallly old browsers won’t work). Save a copy of your website files before changing these settings to be on the safe side. Though it’s pretty easy to delete any changes made.
Firstly go ahead and create your page in Dreamweaver with AP Divs. Then you need to create a ‘wrapper’ (or call it what you want) CSS tag, that will basically wrap around your AP Divs to group them together and get them to centre in a browser.
So go to Code view (or Split view) and in the code insert a line just below the first opening <body> tag.
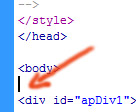
Then type in <div id="wrapper"> on the new line.
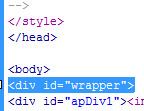
After that scroll down to the bottom and insert a new line just above the closing </body> tag.

Then type in a closing </div> for the wrapper.

That finishes with the Code view so you can go back to Design view.
Next you have to create a CSS body style.
Click on the small icon in the bottom right of the CSS Styles palette, which looks like a page with a plus symbol (text should appear saying New CSS Rule to confirm it’s the right thing).
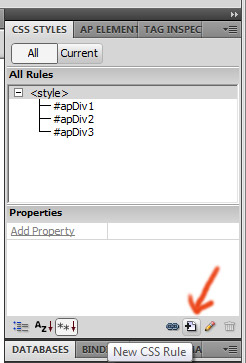
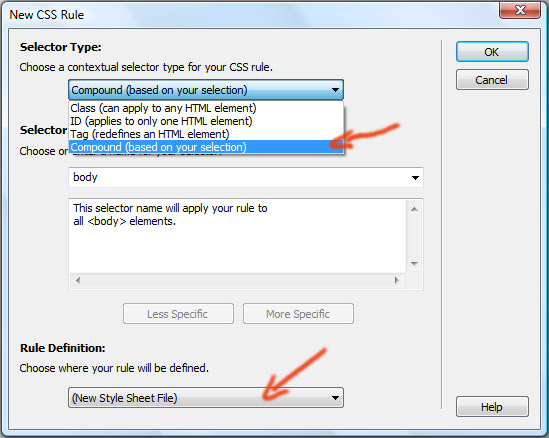
A dialogue box should appear. From the Selector type choose Compound. The Selector Name should then automatically default to ‘body’ (note no ‘#’ at the front). If it doesn’t show it automatically then type in the word body as shown below. I also chose to define my rule as a new CSS file, not one just linked to the document (re the bottom arrow selection). So just save it and call it what you want. I called mine “centred_in_browser.css” (which you can then apply to other pages).
In the new dialogue box that appears choose Block from the left-hand side list and change Text-align to center. Then click OK.
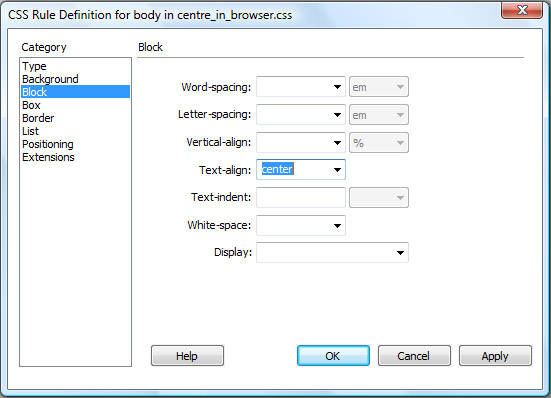
Next you want to make a new CSS rule for the wrapper. Again click on the small New CSS Rule icon in the bottom right of the CSS Styles palette.
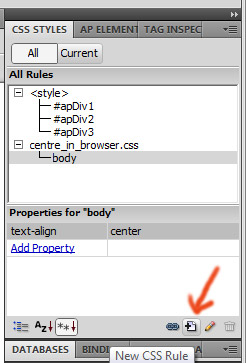
This time you want to define the wrapper, so choose Compound again, but change the name to #wrapper (don’t forget the # at the beginning), as shown below and click OK.
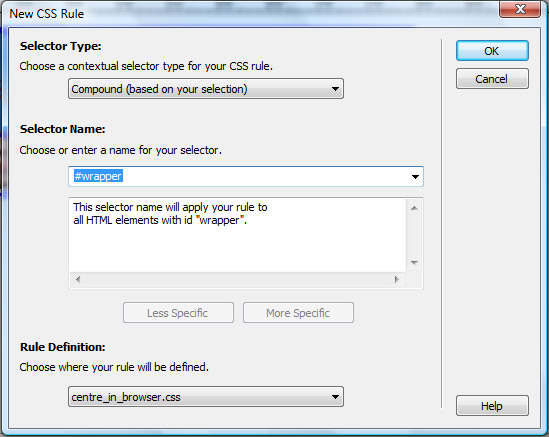
Then in the next dialogue box change the following settings:
Block = Text-align change to left
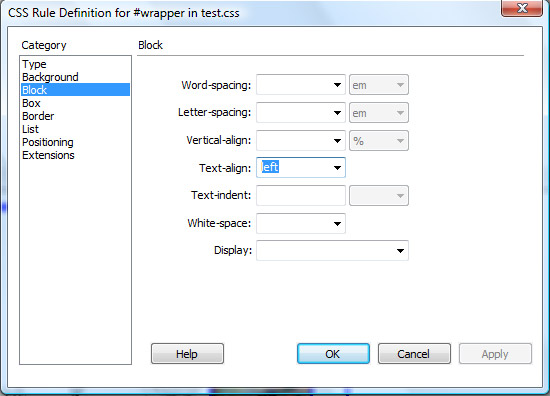
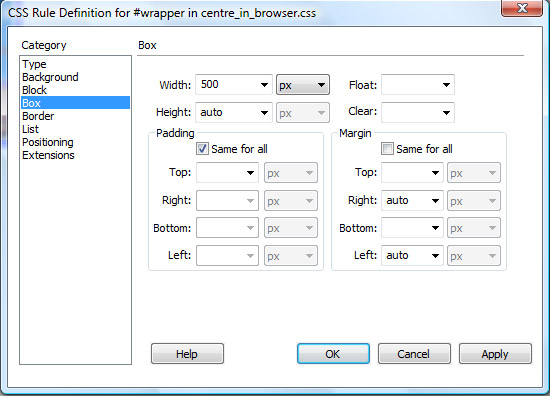
Box = Width to whatever the width of your document is. I’ve said 500 px here, but it is whatever width you’ve chosen your site to be. Then change Height to auto. Uncheck the Margin ‘Same for all’ selection and change Right to auto and Left to auto.
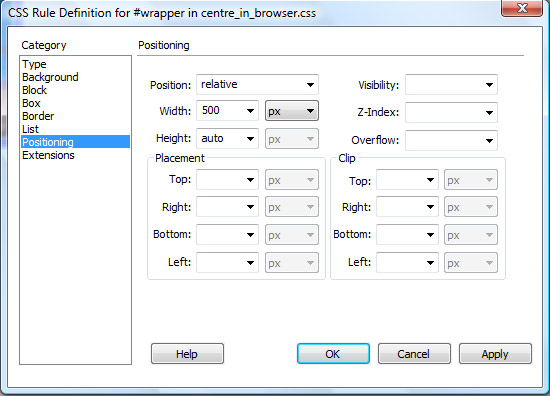
Then choose Positioning and change the Position to relative, the Width should have automatically changed to whatever you’d chosen in the previous Box setting, but just check it is the same (500px in my case) and change Height to auto.
You can then choose Apply if you want to have it update your Design view. You should see everything centre itself (which was different to GoLive which didn’t show as centred until it was in a browser). If you’ve only guessed at what Width your site was you can now change the Width to correct it and chose Apply again till it’s right. You can see a sort of bar at the top of the Design view which is actually the wrapper, which will show you the width. This wont appear in the browser.
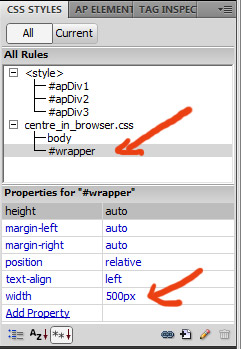
If you want to change the settings after you’ve selected OK just double click the CSS item in the CSS Styles palette, or you can change the settings in the Properties listed underneath by clicking on them, ie the width setting.
If you add any more AP Divs to your page just make sure in your Code view that the closing </div> for the wrapper tag is still at the bottom just above the closing </body> tag. If it isn’t, move it.
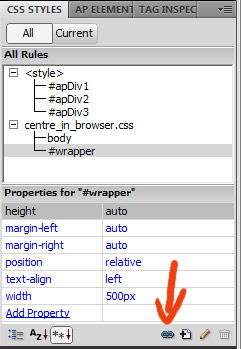
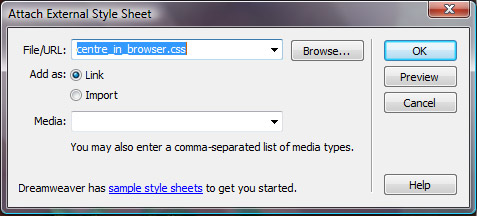
Note that if you saved the style sheet like I did (ie a new one) you can then apply it to other pages in your website. You can do this by opening your new html page and clicking on Attach Style Sheet link icon in the CSS Style Palette.
Then in the File/URL box use the browse button to find where you save the CSS style. Select it then choose OK then OK again in the Attach and External CSS dialogue box.
The only thing you will still have to do to get it to work is to do the first bit of this process which is type in the two wrapper tags in the Code view of your page, as per above at the start of this How-To.
Hope this is of help to someone.